Saturday, January 24, 2015

Roasted Butternutnut Squash Soup

OK so I am going to be promoting two of my newest obsessions The first is one of the newest additions to my kitchen, the Vitamix blender (thanks Mom and Dad!).  Ever since I got it I have been looking for new recipes so I can use it.  My husband and I have gotten in the habit of bringing healthy smoothies to work each morning (blog post on that to come) but this is the first dinner dish I have made with it.  If you don't already know, the Vitamix is a very powerful blender with a 2 horsepower motor which can pretty much blend anything and sounds like a rocket launch. 

My second new obsession was a gift from my sister, a subscription to Salted (https://www.saltedtv.com) which is basically Netflix for cooking tutorials.  I am officially obsessed and watch the videos all the time even if it is about something I have made before so I can learn more about the reasons why things are cooked the way they are.  The videos are all from expert chefs that do a really good job of breaking down a recipe or cooking technique step by step so you can really learn the basic cooking skills that you need when cooking anything.  The tutorials range from making a basic sauce to cooking a Thanksgiving turkey.

The reason why I bring up my two obsession is because I used both for my butternut squash soup.  I have never made butternut squash so it was extremely helpful watching a video that broke down the process of making it.  I found the most helpful part to be cutting the squash open.  Squash has to be one of the most intimidating thing to cut into, it is round, unstable and has a very thick skin that is hard to break.  I was very uncomfortable cutting the squash at first but once I watched how it should be done, I felt so much more at ease because I had some idea of what I was doing.  Luckily everything worked out and I didn't lose any fingers (YAY!) and the squash was cut in two parts with a steady bottom ready to start preparing to roast.

The great thing about this recipe is it can be made ahead of time.  I had a busy week, so I roasted the squash a day before I made the soup.  After I roasted the squash, I let it cool completely and stored it in the fridge until I was ready make the soup.  You can even make the entire soup ahead of time and reheat in a saucepan when ready to use.  You can store it in the refrigerator for a few days or in the freezer for up to a month.  Note that the soup does thicken up when cooled, so you will need to add some water to thin it out a bit.

I was shocked how much my husband loved this dish.  He is not always up for trying new things but he loved it, he even wanted to bring the leftovers to work the next day.  This dish is the ultimate comfort food.  It has so many rich flavors and gives off such a great aroma, it just smells like Fall.  I can't wait to make more recipes like this in the Vitamix.

Ingredient count: 10 (only had to buy 5 ingredients)

Preheat the oven to 350 degrees.  With the skin side up, cut  each half in half so you have 4 pieces of about even size.  Scrape out the seeds using a large spoon.
 Add squash to a roasting pan.  Season with salt, butter, rosemary, crushed red pepper, cinnamon, and pepper.  Place in the oven.


Depending on the size of the squash, cook for 45 minutes to 1 1/2 hours.  Squash is done when it can be easily pierced with a knife.

Remove squash from the pan.  Collect any juices from the bottom of the pan and set aside.

Remove skin from squash and mash the squash with a potato masher a bit.  Set aside.


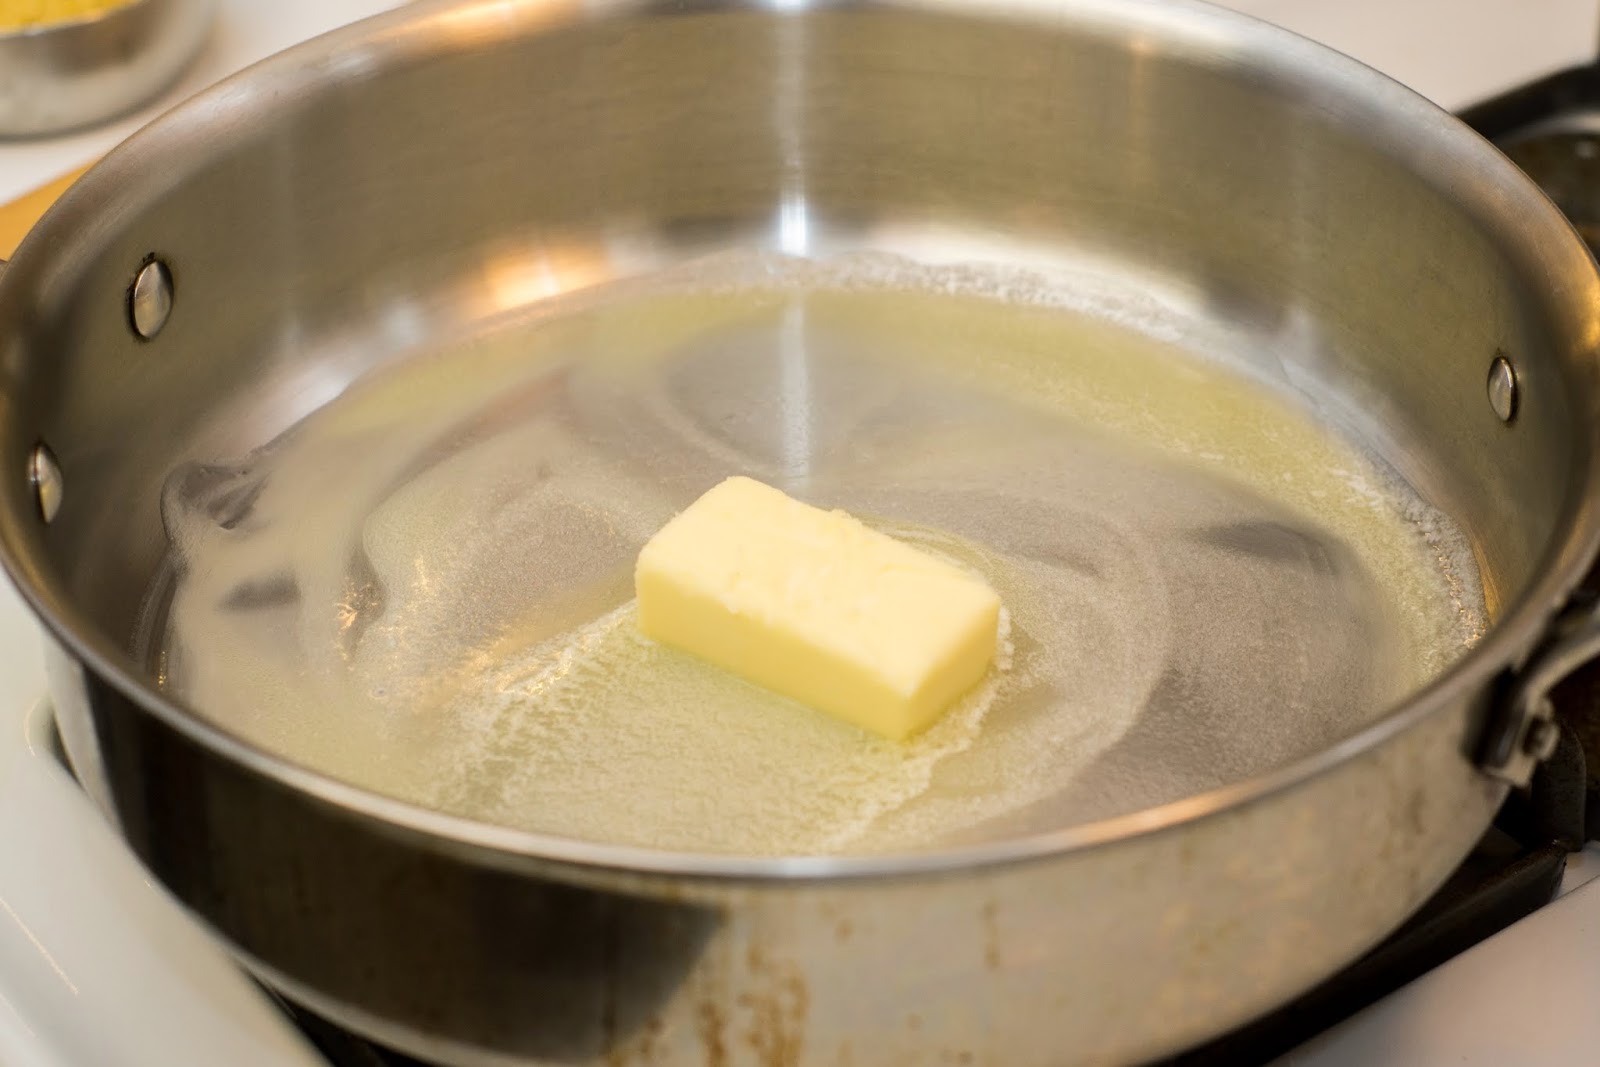
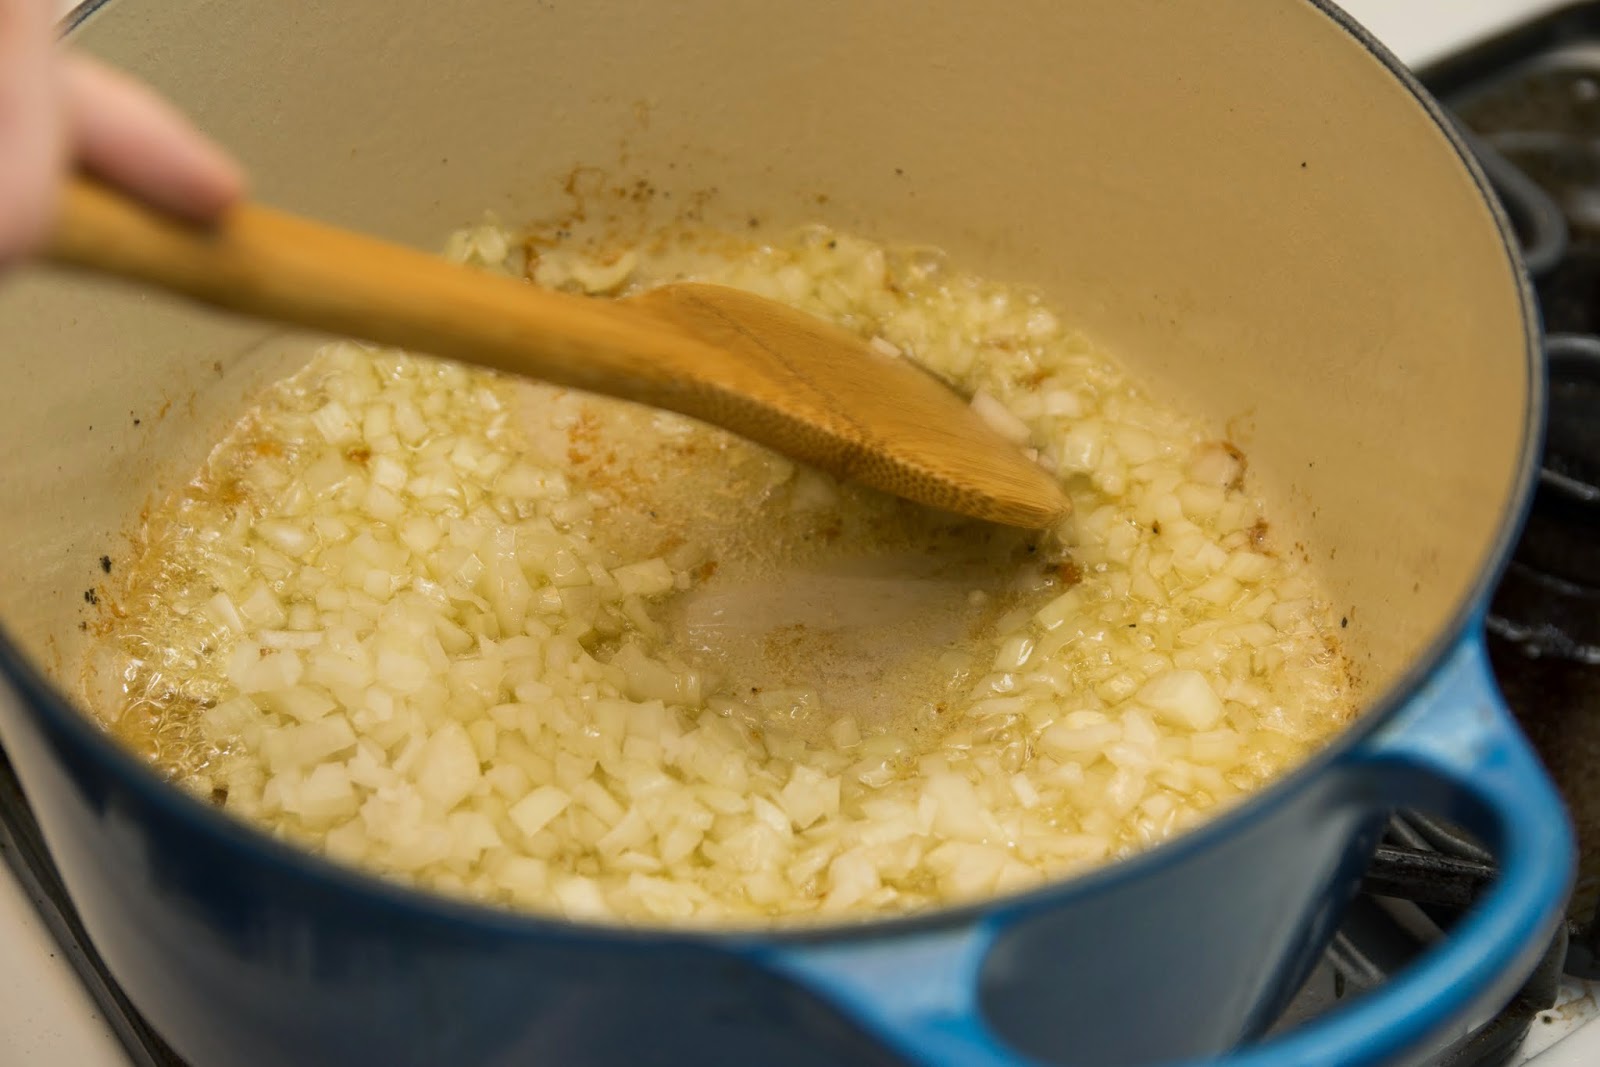
To start the soup, melt butter over medium heat and add rosemary and red pepper flakes.  Cook for 2 minutes, Add onion, cook until onions are translucent.
Add in squash and squash stock (juices from the roasting pan).  Bring to a simmer and cook down for 20 minutes.
Add heavy cream, stir to incorporate.  Bring to a simmer, cook for 8 to 10 minutes.
Once cooked, remove from pot and let cool for a bit.

Pour contents into blender and blend until completely smooth.
 Serve immediately


Roasted Butternut Squash Soup
Recipe from Salted and Bruce Kaleman
 
Butternut squash, about 3 lbs.
4 tbsp. butter
¼ tsp red pepper flakes
Rosemary, 3 sprigs
1 tsp. cinnamon
1 cup water


1 tbsp. butter
¼ tsp. red pepper flakes
Rosemary, 1 sprig
Onion, julienned
2 garlic cloves, smashed
Mashed butternut squash
2 cups squash stock or vegetable squash
½ cup heavy cream
Salt and pepper, to taste

Roasted Butternut Squash Instructions

Lay the squash length-wise on the cutting board. Using a chef’s knife, slice off the top of the squash, or about one inch away from the tip. Place the knife directly above the seed pocket and slice to remove.

Turn the squash pieces so that they sit flat on the cutting board. Cut these 2 pieces in half, yielding four halves total.

Use a large spoon to scrape the seeds from the bottom-most squash halves. If there are any extra hairs or seeds in the other squash halves, scrape these out as well.

To roast the squash, place four halves on the sheet tray, facing up. Season with salt, butter, chili flakes, rosemary, cinnamon, and pepper. Pour the filtered water into the pan, as this will allow the squash to steam. Cover with parchment paper and aluminum foil. Seal the edges to allow the squash to steam thoroughly.

 Place in an oven heated to 350 degrees. Depending on the amount of squash, cook for 45 minutes to an hour and a half. Check on the squash by gently piercing the flesh with a knife; if the knife pierces easily, the squash is ready.

 Remove the squash from the oven. Remove the rosemary and continue with the desired squash recipe.

Soup Instructions

In a medium saucepan over medium heat, melt the butter. Add the olive oil, rosemary and crushed red pepper and cook for about three to four minutes, stirring frequently.

Add the garlic and onions to the saucepan and season with salt and pepper. Cook for 10 to 12 minutes or until translucent.

Add the roasted butternut squash and the squash stock to the saucepan, mixing with a spoon until fully incorporated. Bring the mixture to a simmer and cook for 20 minutes.

Add the heavy cream and stir to incorporate. Bring the mixture to a simmer and cook for 8 to 10 minutes.

Once fully cooked, remove the pot from the heat and allow to cool for ten minutes. Pour the contents of the pot into a blender and blend on high for 30 seconds to a minute or until completely smooth.

Taste the soup and season with salt, as necessary. Blend the soup for an additional 15 seconds.

Pour the soup into individual serving bowls.


Sunday, January 18, 2015

Green Beans with Shallot and Almonds

I always am on the lookout for recipes and ways to make vegetables into something I want to eat rather than just something I should eat.   This dish is so flavorful, you will want to eat all your vegetables and even make enough for seconds.  I grew up in a house where dinner almost always included a meat, a starch and a vegetable, so green beans have always been a staple for me.  I remember one of my first kitchen tasks as a kid was trimming the ends off green beans.


There is no excuse not to include a vegetable with dinner when you have a recipe this easy and delicious.

Ingredient Count: 5 (only needed to buy 2)

Ingredients
1 lb. Green beans
1 Tbsp olive oil
1 small to medium shallot, thinly sliced
Salt and pepper, to taste
1/4 cup sliced almonds

Bring a pot of water to a boil.  Add green beans to boiling water.  Cook for about 3 to 5 minutes, until green beans are just about tender.  Drain and plunge in ice water. Let sit for about 1 minute and drain.

Heat olive oil in a saute pan over medium high heat.  Once hot, add the sliced shallot.  Stirring once or twice until golden and crisp, about 5 to 10 minutes. Transfer the shallot to a plate lined with a paper towel using a slotted spoon. 

Add the green beans to the pan, season.  Cook until green beans are crisp- tender.  Serve with shallots and almonds on top.


Sunday, January 11, 2015

Simple Rice Pilaf

 This is my go to side dish recipe.  It is so simple, even easier than boxed rice and it pairs with absolutely anything.  Before I made this rice for the first time, I would use the boxed rice when serving rice for dinner, but ever since I have tried this, I have never gone back to boxed rice.  It takes an equivalent amount of time but packs more flavor without the sometimes soupy consistency of boxed rice.  You also control the amounts of ingredients when you cook your own, which is always a plus if you are concerned about your sodium intake or unpronounceable ingredients in pre-made food products.   This recipe is my base recipe, but you can also add a variety of different ingredients to this depending on what your are serving as your main course.  You could add vegetables, garlic, almonds or even pieces of cooked chicken to make this a meal of its own. 

For those that don't know, rice pilaf simply means rice that is cooked in broth.  When I first started making this, I used standard chicken broth but one day at the store I saw that College Inn sold a white wine and herb flavored chicken broth so I thought I'd give it a shot.  That broth was amazing in this rice and adds such a rich flavor to the rice that standard chicken broth does not.  Ever since then, I use for this when I make the base (and others) recipe of this rice.

Ingredient Count: 6 (I usually keep all of these ingredients on hand)

To begin, add 4 tablespoons butter to a skillet and turn on the stove to a medium high heat, Watch to make sure that you only melt the butter and it does not burn.


 Once melted and hot, add the orzo to the pan and saute until golden brown, season to taste with salt and pepper.  Saute for about 3 to 4 minutes.
 Once the rice is a golden brown color, add the rice.  Stir to combine,  Saute for about 1-2 minutes
 Add the broth, bring to a boil.
Once at a boil, reduce heat to a simmer and cover the pan.  Cook for 20  minutes.  Once complete, remove the lid and fluff the rice with a fork.  Serve immediately.


Simple Rice Pilaf

4 Tbsp. Butter
1 cup Orzo
1 cup Basmati rice
14.5 oz chicken broth (I prefer College Inn white wine and herb chicken broth)
Salt and Pepper, to taste
1/4 cup sliced almonds (optional)

Melt butter in a saute pan.

Once butter is melted, add orzo and saute until lightly golden.

Once the rice is a golden brown color, add the rice.  Stir to combine,  Saute for about 1-2 minutes

Pour in the chicken broth, stir and bring to a boil.

Once at a boil, reduce heat to a simmer and cover the pan.  Cook for 20  minutes.  Once complete, remove the lid and fluff the rice with a fork.  Serve immediately.

 Variations:
Vegetable Rice Pilaf:  Add 1 cup finely chopped onion, 3/4 cup diced carrots, 2/3 cup diced celery,  and 2 cloves minced garlic after adding orzo.  Continue with step 3.  Add diced zucchini or yellow squash after removing rice from heat.  Let stand, covered, for 5 minutes.  (This will steam the veggies) 

Thursday, January 8, 2015

Pot Roast

There is nothing better on a cold day than having a pot roast cooking in the oven for dinner.  The past few days have been absolutely freezing here in the DC area so it was a great time to cook one of my favorite cold weather recipes. 
While a pot roast does take a while to cook, the  the majority of the cooking time is the roast in the oven and the results are well worth it.  The meat is so tender and shreds so easily when it is cooked through.   

Ingredient Count: 12 (only needed to buy 6)


Pot Roast 
2 Tbsp olive oil
1 2-3 lbs. beef chuck roast
2 cups beef stock
1/2 cup red wine
2 Tbsp tomato paste
4 cloves garlic, chopped
1 onion, chopped
1 bay leaf
1 tsp dried thyme
3 carrots, cut in 1 in. pieces
4 red potatoes, cut in 1 in. pieces

Preheat oven to 350 .  In a dutch oven, heat oil over a medium-high heat.  Salt and pepper the roast and place it in the pan.  Brown the meat on all sides, about 10 minutes.

 Turn meat fat side up.  Add stock, wine, onion, garlic, bay leaf, tomato paste and thyme.  Bring to a simmer, cover.  Place in the oven and roast for 2 hours

After 2 hours, add carrots and potatoes and cook until tender, about 1 hour.

Transfer the roast, carrots and potatoes to a platter.  Cut the roast into thick slices and serve with vegetables

Friday, January 2, 2015

Porter Braised Chicken Thighs

I found this website on the Williams Sonoma Blog and absolutely fell in love with the rich flavors of this dish.  To me this the perfect dish for the Fall and Winter time.  I love that it has a slow cooker taste but only has to cook on the stove top for 40 minutes.

My husband and I love craft beers, so this is a perfect dish for us to be able to use a bottle of beer we have in the fridge.  If you are not a dark beer drinker, you can always buy a mix and match 6 pack (which is what we do a lot).  Or buy a pack of porter and do not refrigerate them and keep a few on hand for making this in the future (which you'll want to do once you try this).


My husband loves this dish because not only am I cooking with beer, I use one of our easiest pieces of cookware to clean, the Le Creuset dutch oven.  The Le Creuset is one of favorite cooking tools of all time.  It cooks like nothing else and is perfect for anything from braising to cooking a pot roast to just sauteing meat or vegetables.  I look for any excuse to use it especially in the winter  (even though I love our All Clad cookware as well).


While this recipe is from Williams Sonoma, I did make a few edits such as cutting out the celery root and only making 4 pieces of chicken, rather than 8, due to the size of my Dutch oven and number of people I am cooking for.


Ingredient count:11 (only needed to buy 5)
Porter Braised Chicken Thighs (credit: http://www.williams-sonoma.com/recipe/porter-braised-chicken-thighs-with-root-vegetables.html)

Season the chicken thighs with salt and pepper. In a Dutch oven or other heavy pot over medium-high heat, warm the oil until very hot but not smoking. Add the chicken thighs, skin side down, and cook, turning once, until lightly browned on both sides, about 5 minutes. Transfer to a platter.


Reduce the heat to medium, Add the onion and sauté until golden, about 6 minutes.

Add the carrots, and potatoes, then stir in the porter, broth, brown sugar, mustard, tomato paste and thyme.


Return the chicken thighs to the pot, submerging them in the liquid, and bring to a simmer.

Cover, reduce the heat to medium-low and simmer, stirring occasionally, for 30 minutes.

Serve in a shallow bowl.

Ingredients
2 carrots, cut into 1 in chunks
2 red potatoes, cut into 1 in chunks
1 yellow onion, minced
4 bone-in, skin on chicken thighs
2 Tbs olive oil
1 (12 fl oz.) bottle Porter
1 cup chicken broth
1 Tbs, packed light brown sugar
1 Tbs. Dijon mustard
1 tsp, tomato paste
3 sprigs of Fresh thyme

Season the chicken thighs with salt and pepper. In a Dutch oven or other heavy pot over medium-high heat, warm the oil until very hot but not smoking. Add the chicken thighs, skin side down, and cook, turning once, until lightly browned on both sides, about 5 minutes. Transfer to a platter.

Reduce the heat to medium, Add the onion and sauté until golden, about 6 minutes.

Add the carrots, and potatoes, then stir in the porter, broth, brown sugar, mustard, tomato paste and thyme. 

Return the chicken thighs to the pot, submerging them in the liquid, and bring to a simmer.

Cover, reduce the heat to medium-low and simmer, stirring occasionally, for 30 minutes.


Roasted Red Peppers and Hummus


Happy New Year!  I thought I'd start out 2015 with one of my favorite healthy snack recipes. This recipe is so incredibly easy and such a great snack to bring to work or dress it up to serve as an appetizer at a party.  There are also so many variations to hummus, you can make it with pretty much anything in your fridge or pantry.  I prefer roasted red peppers because they pack a bit of a punch and the peppers are just as easy to make from scratch but taste pretty much the same as the jarred ones mixed in the hummus.

I roast my peppers in a 450° oven for 50 min but you can also put the peppers under the broiler for 10-15 but you need to make sure you watch them because they can char very quickly.  You can also grill them (but seeing as we still do not own a grill, that option is out for me). 

To roast the peppers, place the peppers on a rimmed backing sheet covered in foil.  Place the peppers in a 450° oven for 50 minutes, flipping the peppers halfway trhough.

Once the peppers are cooked, they should looked a bit charred,  wrap the peppers in the foil and let them sit for 15 minutes to cool. Don't worry if you crush the pepper a bit. if the foil is too hot, use a towel to wrap the foil.  

Once the peppers has cooled, remove the skins, stem and seeds.  Run under water to remove any skin that is stubborn.

Once complete, the peppers can be used for the hummus, eaten as is with a fork with a little salt and olive oil, served on a sandwich or mixed in with a pasta sauce.


Ingredient count: 9 (only needed to buy 3)  
Roasted Red Pepper Hummus
1 (15oz) can Chick Peas, drained
1/2 cup roasted red peppers (equivalent of 1 to 2 whole red peppers) 
2 Tbsp tahini 
2 cloves garlic, peeled and smashed
2 Tbsp lemon juice
1 tsp cumin
1/4 papriki
1 Tbsp olive oil
salt and pepper, to taste

 Add  all of the ingredients, except the olive oil, to the food processor.  Blend, while blending, drizzle the olive oil through the top spout.  Continue to blend until the hummus reaches desired consistency


To add some variety, add 1/4 cup feta cheese to change it up 

Serve the hummus, with pita chips, carrot sticks, broccoli, cucumbers, cherry tomatoes, pretzels or as a sandwich spread